American Girl Doll® clothes
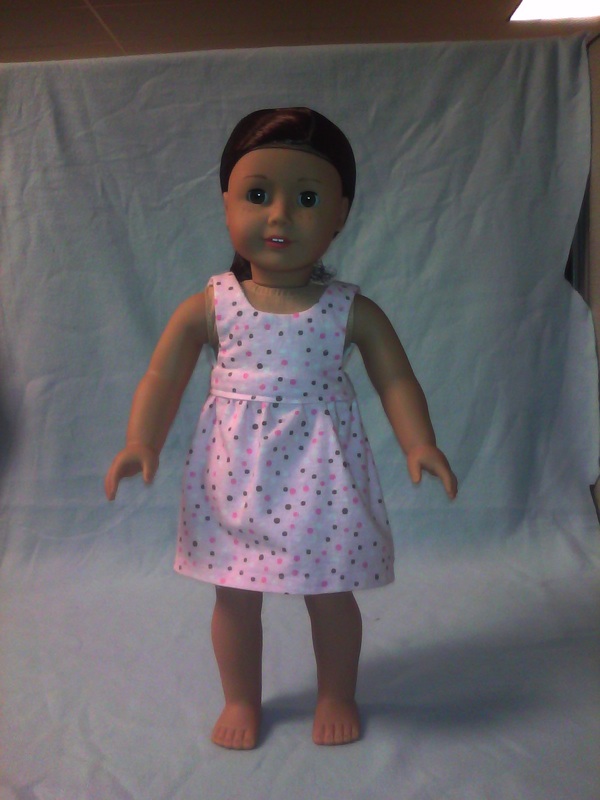
Drawstring Dress by Heritage Doll Fashions
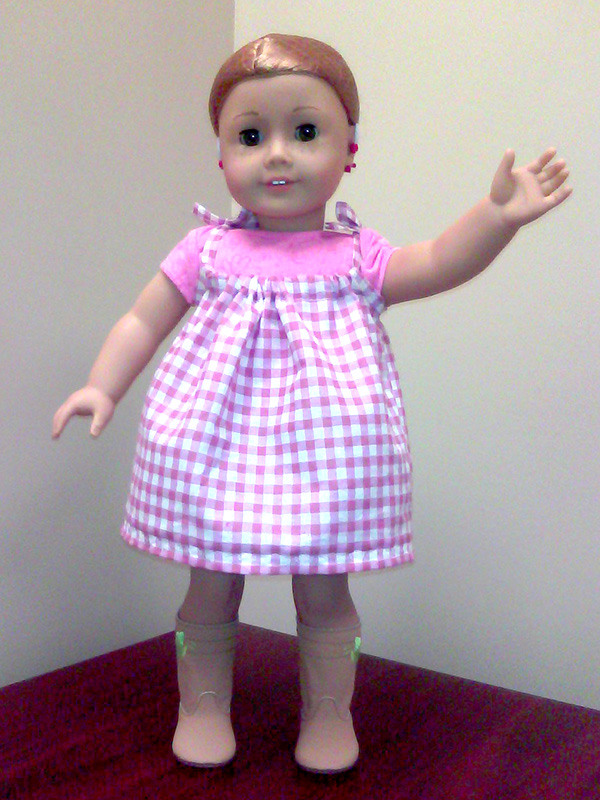
11/13 - This cute dress was my first ever doll dress. I have made clothes for my girls (although not in years, I'm afraid), but I've never done doll clothes. It's cute, but if/when I make it again, I'll use a lighter fabric.
Difficulty: Pretty easy (with the right fabric!).
Time: A little over 60 minutes
Difficulty: Pretty easy (with the right fabric!).
Time: A little over 60 minutes
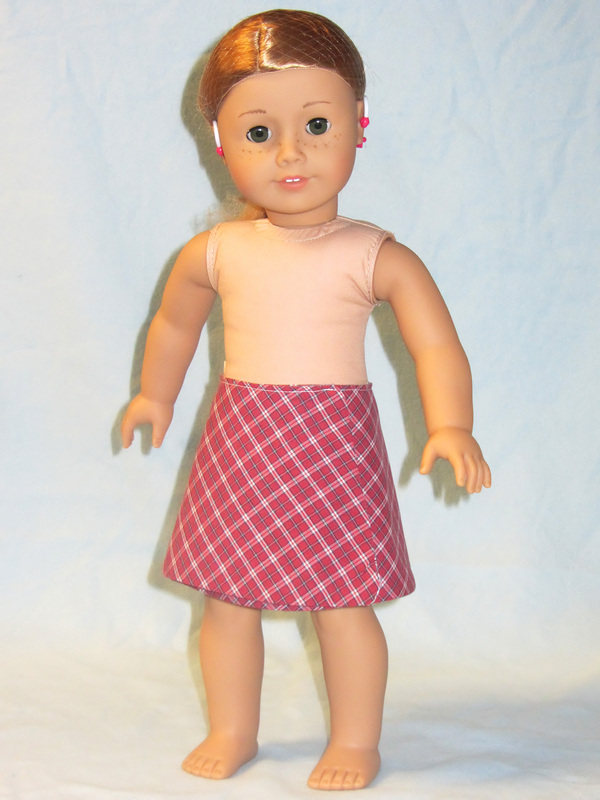
Simple Skirt v1 a Don original
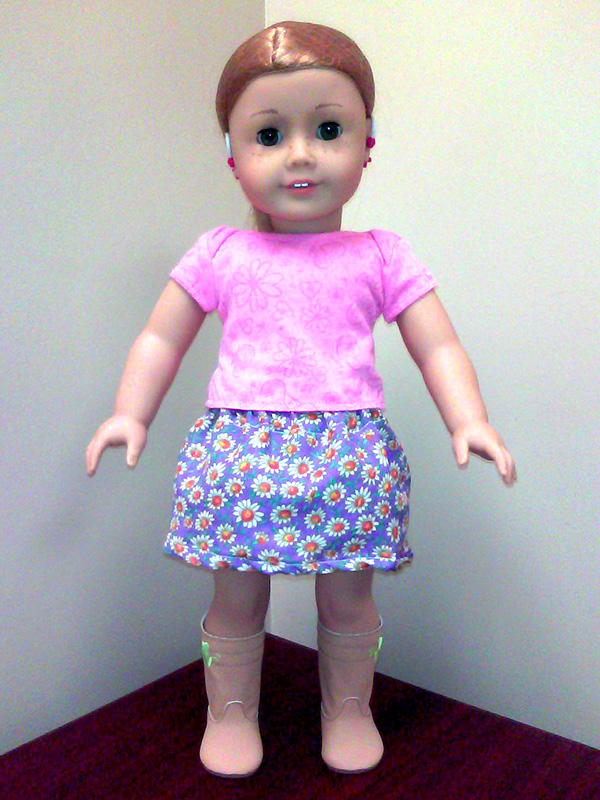
11/14 - I borrowed the hem diameter from the Drawstring Dress and then guesstimated the length. Turned out fine, but I thought it might be nicer longer, so I modified it slightly for v2.
The fabric is a cute floral of unknown (but very light) material (polyester?). I made little shorts out of this for my girls years ago, but it didn't hold up so I never used it again. I brought it back out for doll clothes as the dolls won't be as hard on their clothes as 4 year old girls!
Difficulty: Really easy.
Time: 30 minutes? I didn't keep track
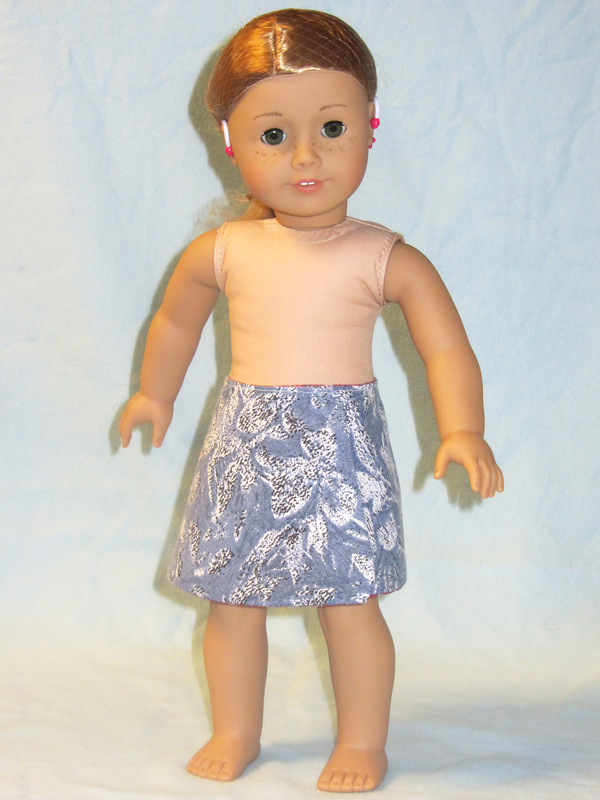
Simple Skirt v2 a Don original
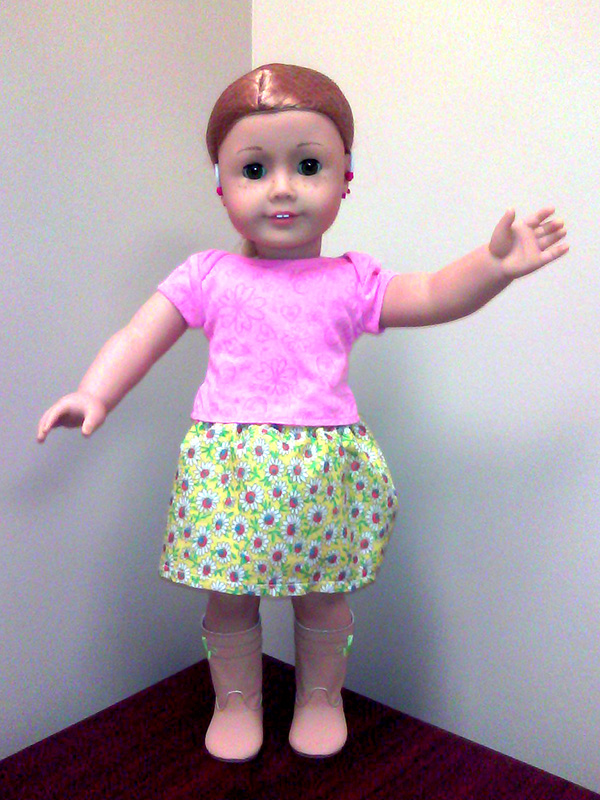
11/15 - Exactly the same as Simple Skirt v1, except a little longer. All other dimensions, etc the same.
The fabric is the same, just a different print.
PDF patterns of my designs/modified designs coming soon!
Difficulty: Really easy.
Time: 30 minutes? I didn't keep track - probably less on this second one.
The fabric is the same, just a different print.
PDF patterns of my designs/modified designs coming soon!
Difficulty: Really easy.
Time: 30 minutes? I didn't keep track - probably less on this second one.
Simple Dress v1 a modified June original
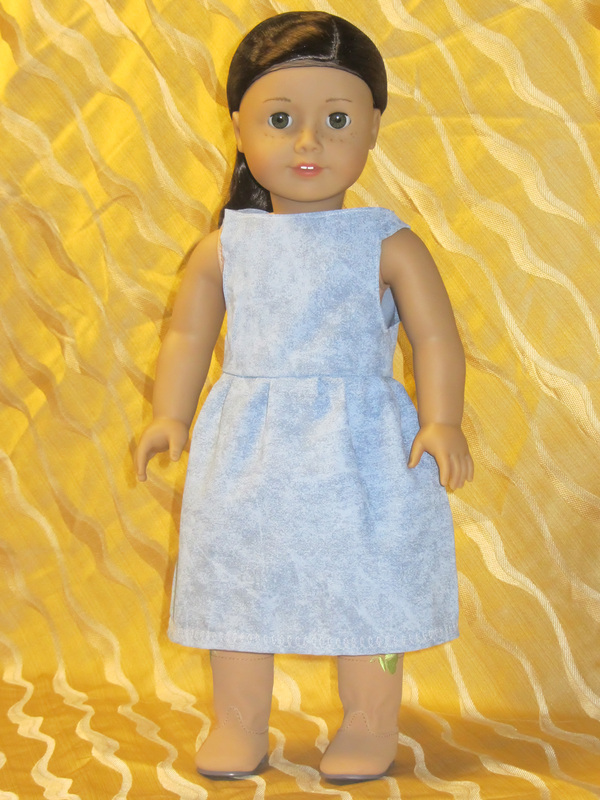
11/16 - My grandmother made a dozen doll dresses each for each of her great-grandchildren a couple years ago and gave each of them a doll. My girls cherish these as each was beautifully crafted and many are quite fancy gowns and most have little pearl necklaces built right into the dress. I took the simplest of these dresses and attempted to design a pattern based on it (adding 25% to all measurements, as the American Girl Dolls are a bit bigger).
The result is wearable (it fits great), but when I try again the neckline will be prettier. I think that is the only thing I messed up from the original. What killed me was the pleat, I had never done one before!
11/28 UPDATE - I finally took a picture & uploaded it & have decided that the neckline really isn't all that bad. There is also a close-up of the snap I used on it; I bought 3 dozen on eBay for about a dime each, so I should have plenty.
11/14 UPDATE - Scroll down to 12/14 and see how I updated this dress!
Difficulty: Somewhat challenging.
Time: I wish I had kept track, I'd guess about 2-2.5 hours
Blue Jeans! by Milo Mila

11/19 - Skirts and dresses are great, but nothing beats a nice pair of blue jeans. The beautiful part of making blue jeans for a doll is an old pair of my jeans has more than enough fabric for two pair for them (so they are basically free!). I gotta say, I loved this pattern! I haven't purchased any patterns yet, but when I eventually do, I will be checking her site first. Why? It was soooo easy and it fit perfectly the first try! I may love sewing, but I'm not great at it, so to be able to start to finish make a really cute pair of jeans in about 1 hour was awesome!
11/22 UPDATE - I made a second pair using the same denim & the same pattern today, but I stitched little faux back pockets with blue thread on this pair. They won't fool anyone, but I think they look nice.
11/24 UPDATE - I did a little hand-embroidery on the pant leg to dress them up a little. I'm pretty rusty (I can't remember the last thing I embroidered!) but I think it turned out ok.
Difficulty: Surprisingly easy.
Time: 1 hour
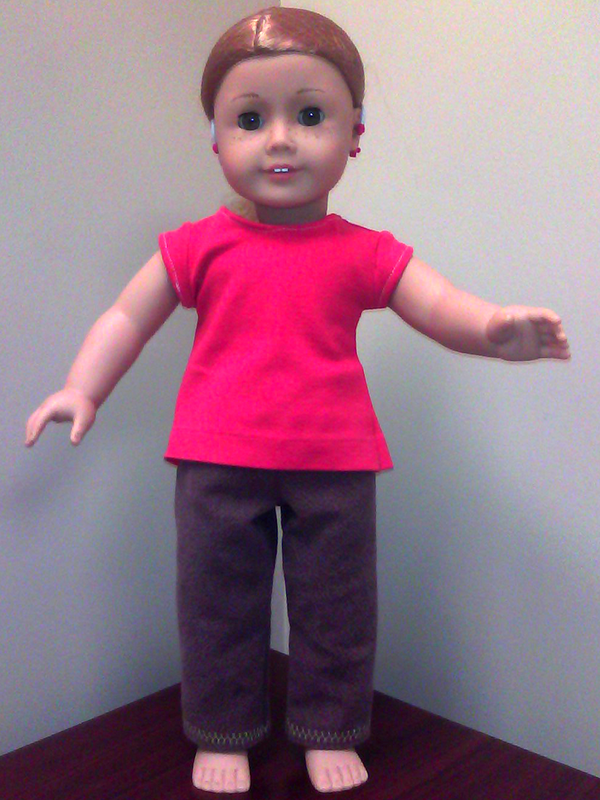
Yoga Pants! by Milo Mila
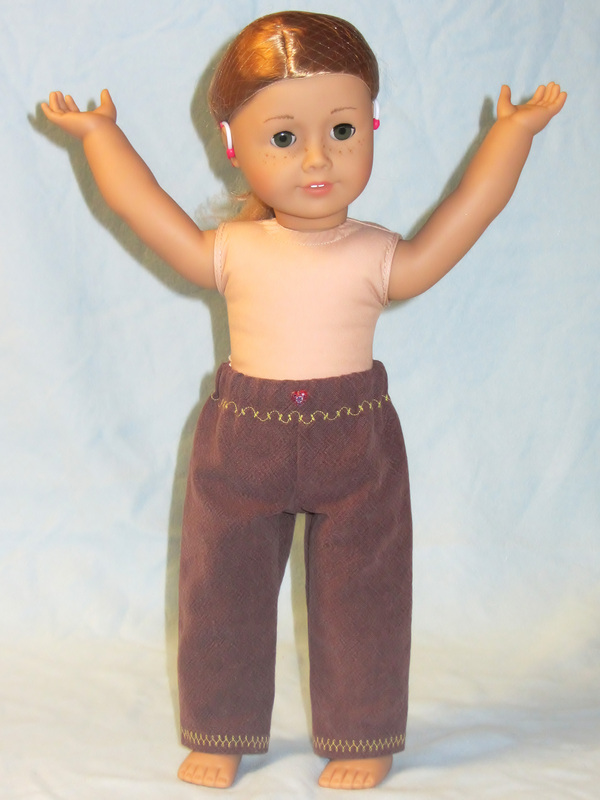
11/20 - My wife is into yoga & my kids think it is cool - now their dolls can do it in style! I used the same super-easy pattern as the blue jeans & this time did two pair at a time. Under 90 minutes & both dolls have exercise-wear. The fabric is a hemp-cotton blend from - you guessed it - an old pair of (my) yoga pants. I used a bright yellow thread and a fancy stitch at the cuff and a different fancy stitch at the waist. This fabric was slightly lighter than the well-worn denim, so it was even easier to work with.
11/24 UPDATE -I added the little glass bead heart to the front, I thought it looked nice that way. I will do the other pair the same way.
Difficulty: Piece of cake!
Time: 2 pair in about 90 minutes
11/24 UPDATE -I added the little glass bead heart to the front, I thought it looked nice that way. I will do the other pair the same way.
Difficulty: Piece of cake!
Time: 2 pair in about 90 minutes
What I wanted to do next: Shirts ... this and/or this or maybe this?
... and why I'm not :(
11/21 - I tried to make this and while I think it looks ok in the picture, the picture was taken with a pretty crummy camera :)
I've always hated knits. Not wearing them, wearing them is ok, but I like fabric that doesn't change size & shape while you are working with it. If you look closely at the closeup pictures I'm not going to take, you can see the stitches kinda jump all over the place. :'( I may wind up trying one more time, but at this point I am strongly considering cutting out several shirts and having my mother sew them when she comes to town. Sigh. On a positive note, the bottom hem looks great! (I used the existing hem from my shirt that I cut up)
Difficulty: 4-letter word territory. Sigh.
Time: I think stood stood still at one point ... I'd rather not think about it.
Jean Skirt by Pattern Patti
11/27 - I cut up a pair of old jeans last week to make little jeans, this week I found a cute little jean skirt from the end of the pant leg of a pair of jeans. I suspect this one works better if you are using a women's jeans (lighter fabric), but it turned out o.k.
Difficulty: Pretty easy - would be easier with lighter denim.
Time: Under an hour
Difficulty: Pretty easy - would be easier with lighter denim.
Time: Under an hour
Satin Dress v1 a Don original (more or less)

11/28 - I have some really pretty white satin material that I think would make a really nice dress. My concern is that if I do it all white, it will look like a wedding dress. A cheap wedding dress :)
I dug through my fabric bin & turns out I have just enough light violet satin material to do the dress two-tone. Yes, we're working without a safety net on this one & I'm more than a little worried ... the white part turned out ok enough, but for some reason it doesn't close all the way in the back - I haven't decided if this is reason enough to scrap it or if I'll keep plugging away at it. In case those shoulders look familiar, they should! I borrowed pretty heavily from the Trendy T-Shirt above - which is why I can't figure out why it doesn't close at the bottom! I can only guess it is because the fabric does not stretch at all.
I did not hem the bottom as it will attach to the violet; I also did not do any double fold overs (please correct me to the right word) except on the back seam as this fabric is really hard to work with as it is, so I am worried it will eventually completely fray into pieces. If I finish it, I will tell the girls to be really, really careful with this one.
For the bottom half (I hope to get it done tomorrow), I plan to use every inch of the violet I have (and hope it is enough) and pleat it to fit. I suspect I will only be able to pleat the sides as it really isn't that much wider than the front + back.
11/28 UPDATE - Yes, the update is the same day, but it is because I stated an hour after work to finish the dress. The violet piece was wider than I realized (probably only because the top was less wide than it was supposed to be), so it got several nice pleats. All-in-all, a really pretty dress - even in person - but it has a couple minor issues:
1) It doesn't really close in back. I can sew a snap at the top, but it seems silly to do so - it isn't like it is going to fall off, it just isn't closed. For a doll, I'm not worried.
2) I do worry, however, that the edges (except in the middle of the back and the bottom hem) will fray, perhaps to the point that the dress will eventually fall apart. I did reinforce much of it with a zig-zag stitch, but there's only so much that can do. Fingers crossed! -- MAYBE NOT! READ BELOW!
3) Not really an issue, but if I did it again, the top would be shorter. It works this way, but would be cuter that way.
Keeping in mind its target audience, I think it's great & I'm very happy with the result, despite the above.
11/29 UPDATE - Sometimes the obvious answer eludes the longest. When Emily uses this fabric to make hair things, she heats the edges with a candle flame to stop fraying. I'll update again when I've had time to try this.
Difficulty: Overly ambitious? Nope! Quite challenging? Oh, yeah!
Time: About 2.5 hours
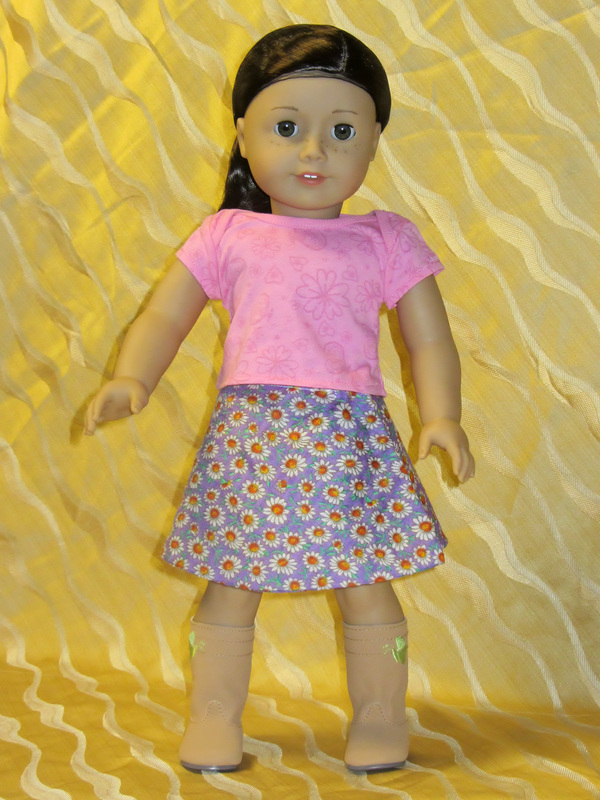
Reversible Wrap Skirt by YouCanMakeThis.com

11/29 - I just discovered Daydream Doll Boutique and found this gem on it. It's super-easy to make & really cute! Unlike a lot of the 2-in-1 dresses I have seen to make, this actually makes sense and is no more work than making a simple non-reversible skirt. As always, I skipped the Velcro and will be using sew-in snaps.
I stayed after work today and made a second skirt. Took just as long as the first because the fabric was a challenge (usually it goes faster the second time). It looks cute & the girls will love it! I made no changes to the pattern, just different fabric.
11/30 - I sewed in the snaps last night, took under 10 minutes while watching TV & today I made a third from two of my shirts. The first was a red plaid (pictured) and the second was a 'Hawaiian-style' print.
Difficulty: A breeze!
Time: 45 minutes (plus the sew-in snap).
The first pic below is the other side of the above, the next two are second and the final two are the third skirt.

|
|

|
|
|
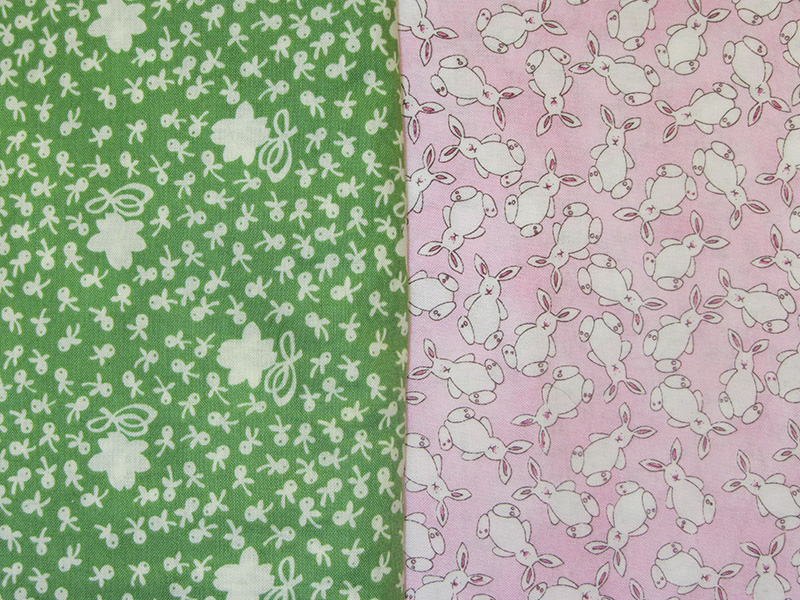
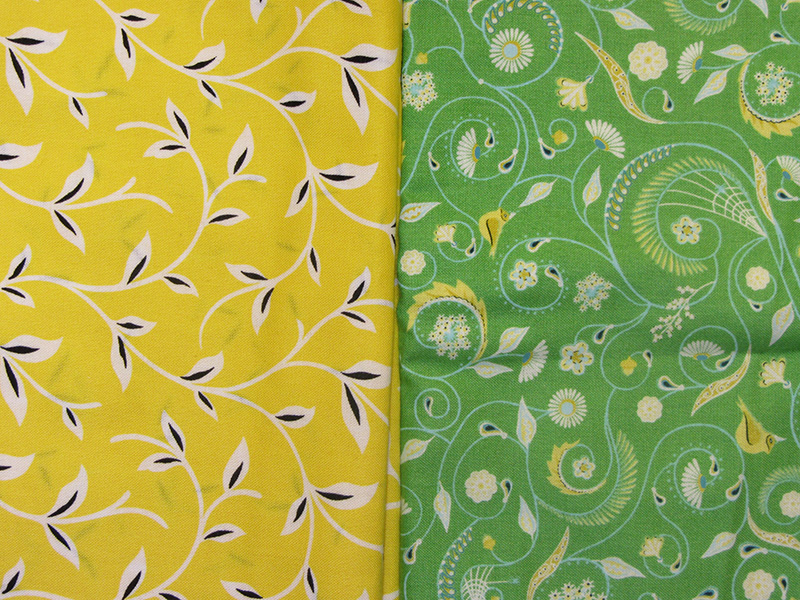
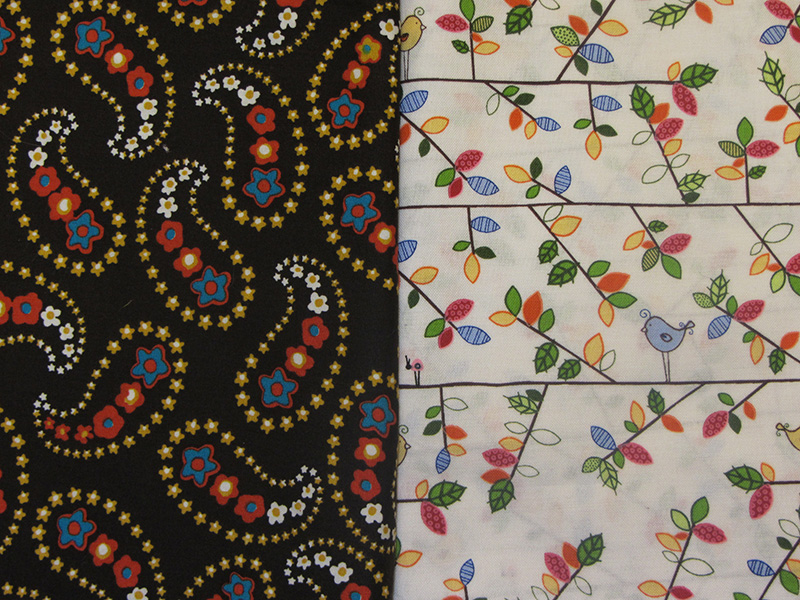
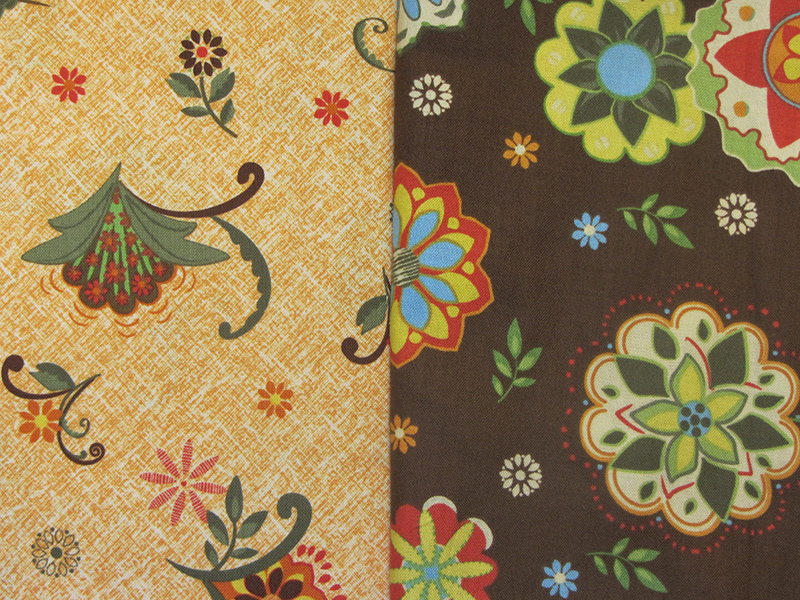
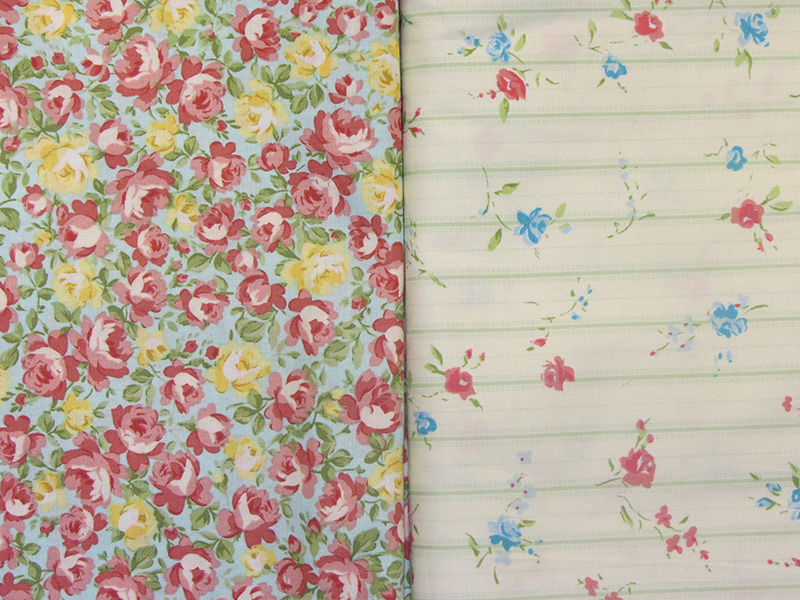
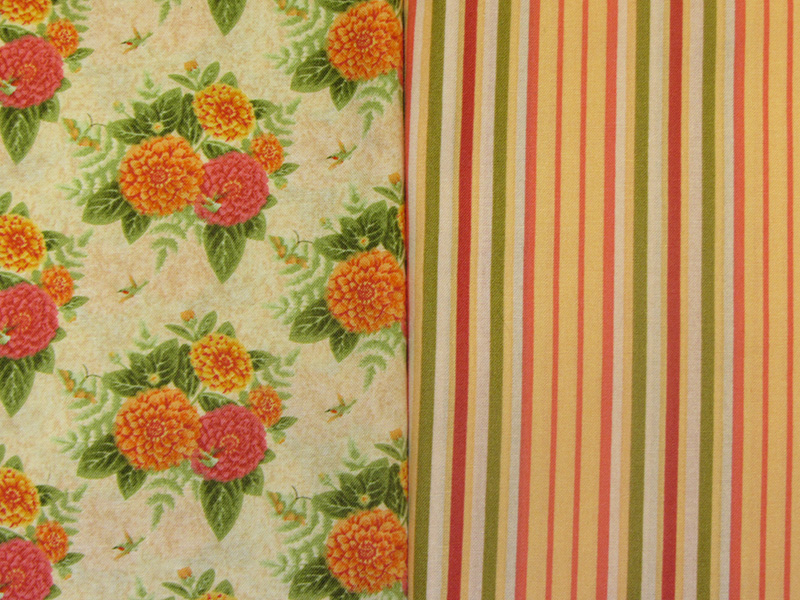
Here are my plans for the next skirts; each picture shows the two fabrics I would use to make a reversible skirt:
|
|
|

|
|
|
|
|
Oh, my!

Fancy clothes!
11/30 - My cute cousin is sending several outfits for my girls for Christmas & they are fancy ones that would exceed my sewing ability! They are going to be so thrilled!
I had intended to make about a dozen reversible skirts for Christmas; now I'm thinking that with these outfits that may be overkill, so I am thinking maybe 6-8 (still 12-16 different 'looks') for Christmas & save the other 4-6 for summer (and do summer prints - including the above v2).
Our friend (who will remain nameless) let me raid her fabric collection for clothes last night in exchange for sewing some outfits for her daughter's doll (hence the nameless, they will be presents). I'm thinking some cute reversible skirts, tote bags & cooking outfits (apron, oven mitt & maybe chef hat). The pairings I have made from her fabric for skirts is above.
12/12 UPDATE - The first batch of outfits arrived today, they are cute!
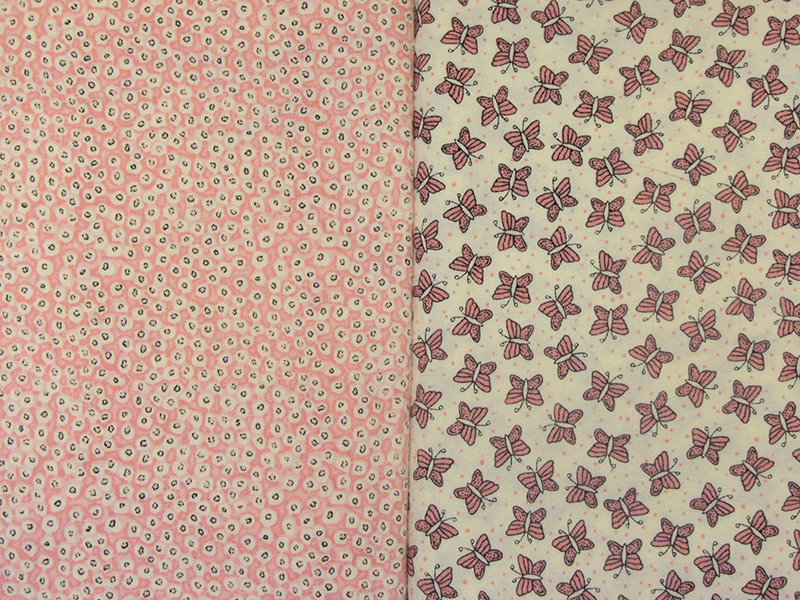
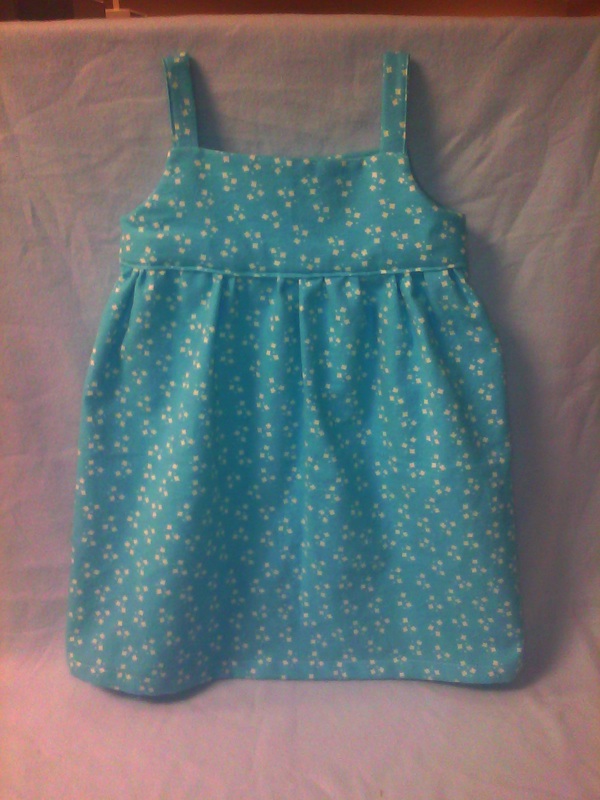
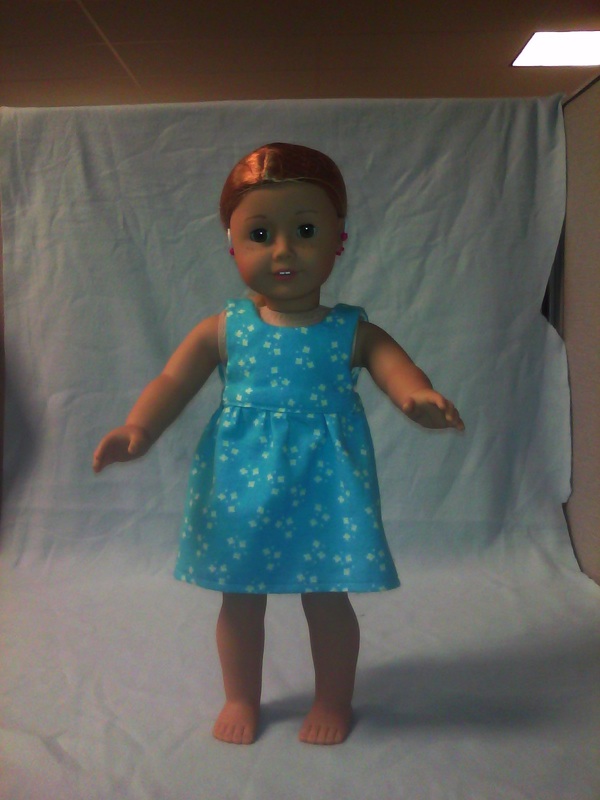
Yoga top a Don original

12/3 - Ok, so it isn't really a yoga top, it's a very modified peasant top I found here. It may look similar in so much as all peasant tops pretty much look alike, but her design called for a single piece of fabric (kinda ingenious) and was very simple to make. So, why didn't I just do that? To make it American Girl Doll-size, it needed a 32" x 6" piece of fabric (or just slightly modified, a pair of 16"x6") & I'm using old dress shirts (this one is an old one of my grandfather's) for fabric (and I'm not that big :) ). So, the body is two pieces and the arms are each 1 piece. Other than that, I started with her basic dimensions (modified for this size doll), but her doll is proportionately skinnier, so I need to make some significant modifications. I should be able to get 3-4 shirts out of 1 (long-sleeve) shirt, so I anticipate having two shirts that I am happy with. If I'm lucky, I'll have 3 (I plan to scrap this one) so I can give one to their friend (whose mom gave me the fabric). When I am done, I will make 2 patterns for my yoga top / peasant top & post them here (one using 1 piece like hers & 1 using 4 pieces so you can upcycle clothes).
12/6 UPDATE - A better picture to follow, but the above picture is really version 2. The sleeves are 1/2" longer and the hem stitching matches the yoga pants. I'll do one more like this one so both dolls can have one.
12/14 UPDATE - I'm running out of time, looks like I may only get 1 done :(
Time: About 90 minutes each, not including measurements.
Difficulty: Rather challenging, due to arms being separate pieces.
|
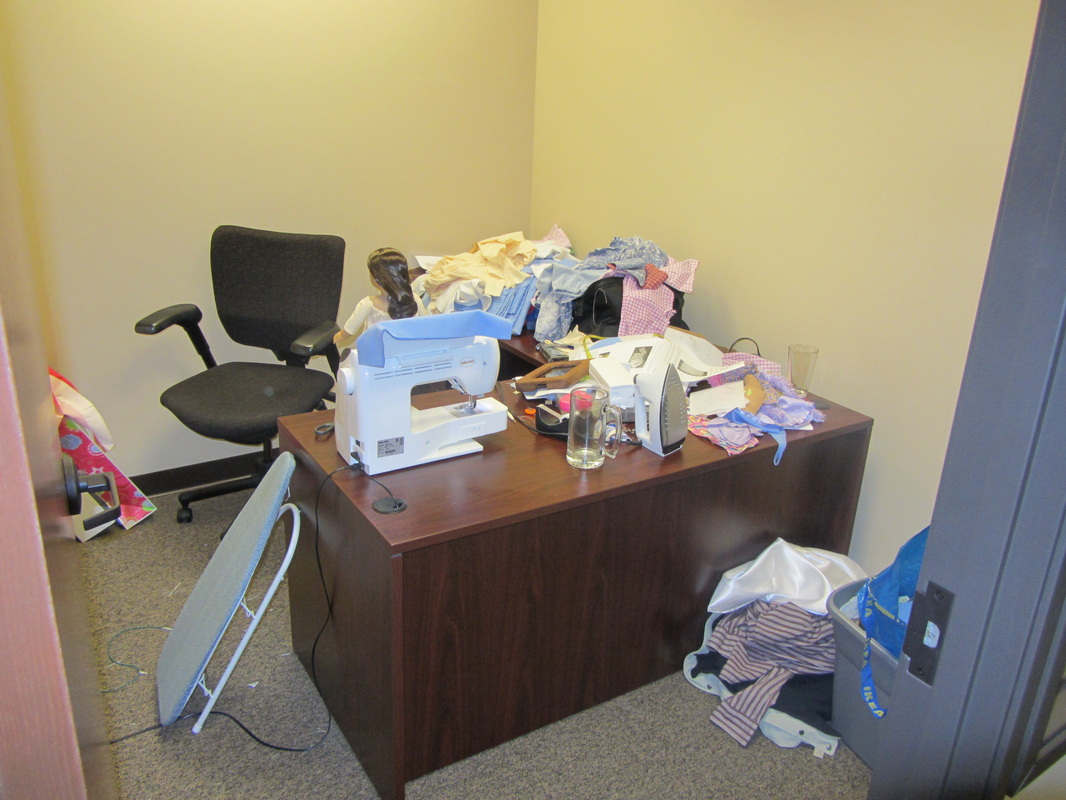
Bonus: Here is what my "sewing room" at work looks like. It is actually quite a bit messier than it appears & much of the fabric is off-camera (but you get an idea). |
|
12/4 - Today was Phoebe's 1st grade musical, so sewing time was limited. I took a seam ripper to the yoga top & made some updates to the measurements for the next one. I also started to cut out fabric, but that is as far as I got.
12/5 - Sickness strikes! I took the girls out (to the local bar - owned by a coworker) last night to celebrate the musical & we shared a Coke (read: I drank a coke & they got a few sips - I didn't want them up all night!). An hour or so later, I'm holding Phoebe's hair back while she throws up :( By morning, Hannah had joined her & if not for leaving work early to take Promethazine, I would have been next. Nothing whatsoever got done today.
12/6 - In addition to the top above, I also started to cut the fabric for the 16 (2 of each) skirts. At 30 minutes each (so far), I have 8 hours of work ahead of me, but I have hopes that if I do them mass-production-style, it will go faster. To that end, I am cutting a 10" x 44" (width of bolt) piece for each (1/2 way done) from which 2 skirts can be cut. Next I'll iron it all, cut out the skirt pieces and then sew them all. For the mass-cutting stage, I have branched out into a second office to have room enough to cut easily.
12/6 - In addition to the top above, I also started to cut the fabric for the 16 (2 of each) skirts. At 30 minutes each (so far), I have 8 hours of work ahead of me, but I have hopes that if I do them mass-production-style, it will go faster. To that end, I am cutting a 10" x 44" (width of bolt) piece for each (1/2 way done) from which 2 skirts can be cut. Next I'll iron it all, cut out the skirt pieces and then sew them all. For the mass-cutting stage, I have branched out into a second office to have room enough to cut easily.

|
12/7 - I finished cutting the bolts, ironed, and traced out 32 pieces at the office today (lunch + after work) and then spent nearly 2 hours at home after the girls went to bed cutting all 32 out. I have around 4 hours in so far; next step is sewing them together. Then iron again & sew on the snaps.
|
Sleep Masks
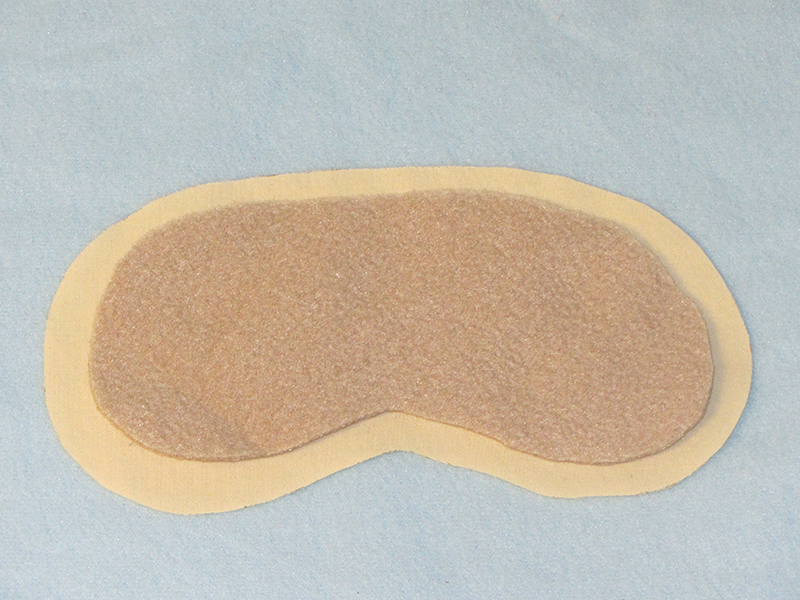
12/9 - I created my first published (self-published, online) pattern today & uploaded it here. I'll put all of the patterns I make there, free and without use-restriction so help yourself!
12/10 - I came in a few minutes early today (15 or so) and pinned 6/16 reversible skirts & at lunch time I sewed & ironed them. With luck, I may be able to do the remaining 10 tonight after work (fingers crossed!). When I am done (perhaps tomorrow), I'll have the dolls model the skirts. Since I am making 2 of each & we have 2 dolls, I think I will have each doll model 1 side of each skirt.
I also cut a small fabric scrap or each fabric I have used so far (except the denim) to send to my grandmother (who inspired me to go crazy making a lot of outfits instead of just 1-2) since she may not get to see the completed outfits in person.
I also cut a small fabric scrap or each fabric I have used so far (except the denim) to send to my grandmother (who inspired me to go crazy making a lot of outfits instead of just 1-2) since she may not get to see the completed outfits in person.
12/11 - Ho-ray! Between lunch & staying late today, I finished all of the reversible skirts! I still have to sew snaps in many of them, but I'll do them occasionally while watching TV, etc.
Scrubs!
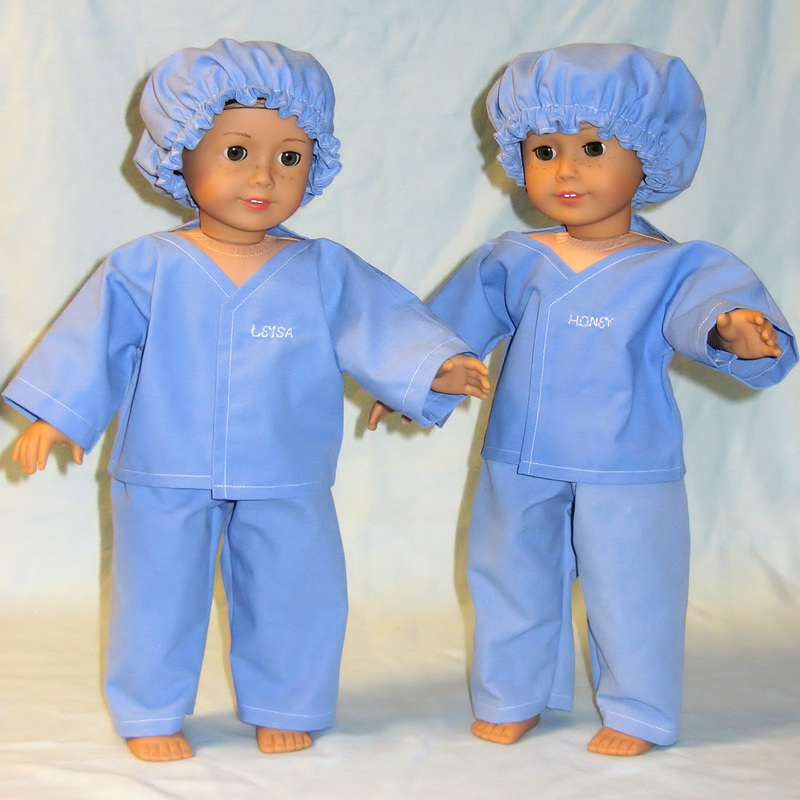
Aren't they cute?!
12/12 - 12/14 - Ok, it took the better part of 3 days, but I did it! Complete sets of scrubs (including little booties, not pictured). Personalized tops & hats ... I think they will love them!
When we went to the American Girl Doll store, we discussed names they might give dolls, if they had them. At the time, we discussed using their middle-names & I hope they still like that idea, as those are the names embroidered on the scrubs!
The pattern called for a straight neck top that closed in the back. I made that top first, but didn't care as much for it, so I made some significant modifications to it. The little booties (not pictured) were quite a bit too big, I can only guess they intended the dolls to wear shoes under them. Makes sense for people, but dolls? I modified them to be worn as shoes. Likewise, the elastic in the hat was too long, I shortened it a whole inch and it is still loose (which I decided is good, so it doesn't mess up the hair). It's hard to see in the picture, but the hats have stitching right above & below the elastic - the second set of stitches weren't called for in the pattern, but it made it easier to close & I think it looks nicer. In addition to the personalizing of the hats, I also sewed little pieces of ribbon in the back to look like a drawstring.
In the end, only the pants went unmodified, but they were so simple that I didn't really even need the pattern. Given how iffy the other items were, I did not attempt the mask - that and Bea can't tie knots well. so ...
Time: About 8-10 hours including all the modifications I had to make. I haven't sewn in the snaps yet.
Difficulty: Somewhat challenging, mostly due to not being able to just follow the pattern.
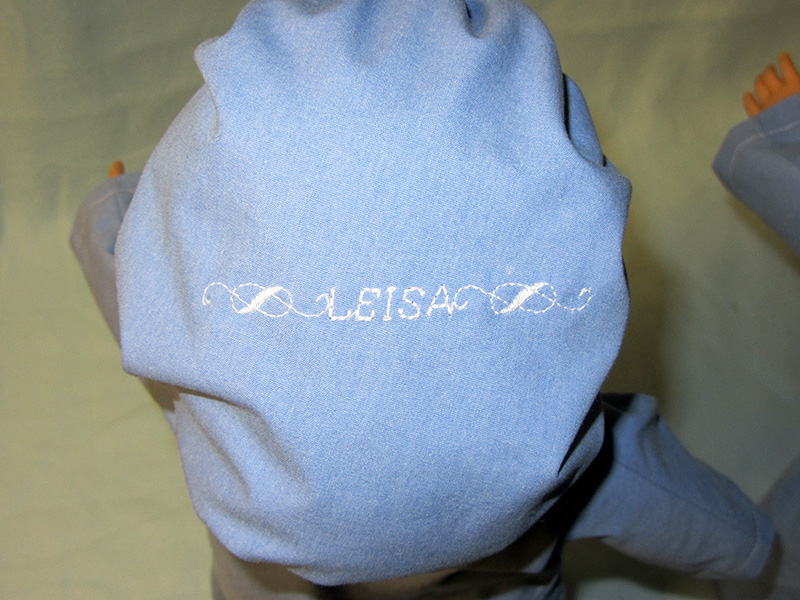
Leisa
|
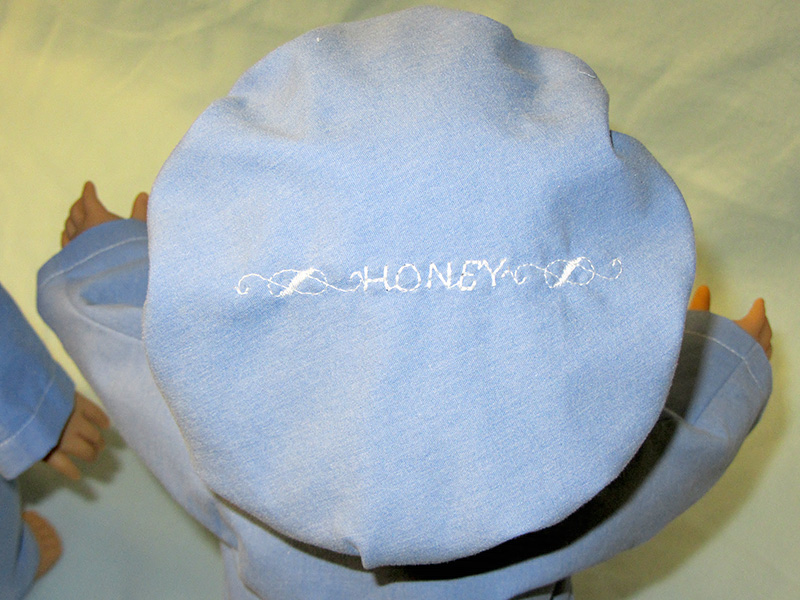
Honey
|
Updated look
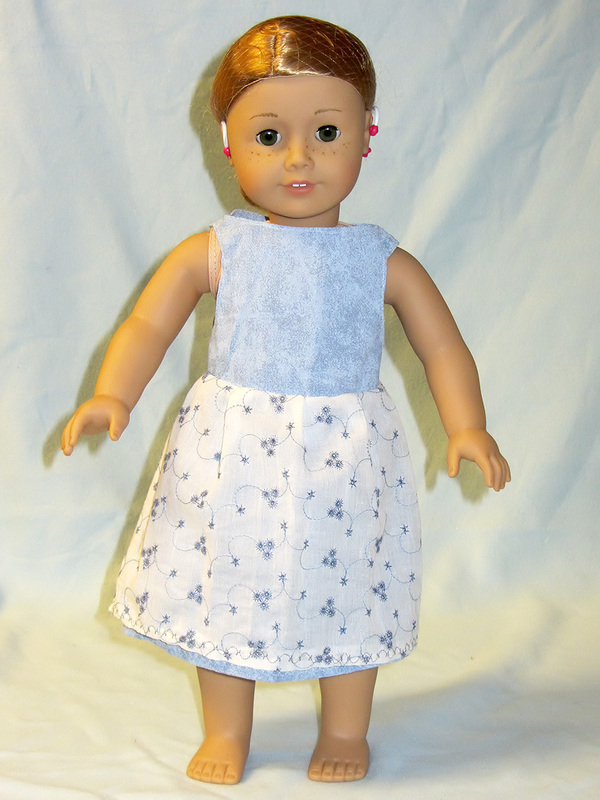
12/14 - I updated the simple blue dress (11/16 above) & I think it looks great! The pleat is roughly the same size & the new layer is attached at the top and on the far sides (which are in the back). I originally combined these two fabrics making little shorts out of the blue and a skirt our of the other (as one clothing item). I thought it dressed it up a little bit.
12/17 - I added a simple built-in necklace, will try to get this picture updated later today/ tomorrow.
Time: This addition took about 1 hour.
Difficulty: Not too bad, I'm getting better at pleats!
12/17 - I added a simple built-in necklace, will try to get this picture updated later today/ tomorrow.
Time: This addition took about 1 hour.
Difficulty: Not too bad, I'm getting better at pleats!
Weekend update!
12/15 - It's crunch time, so every bit counts. I laundered and ironed the flannel for the girls' & dolls' nightgowns & selected a pattern for the doll nightgowns. It's a little fancy, but I'll leave out the embellishments. I also replaced the zipper with - you guessed it - snaps. For the girls' nightgowns ... If they were a 2t, they would have really fancy attire. Everyone makes fancy clothes at that size & they all seem perfectly happy to share their patterns. At the size of my girls? Not so much. So, we're winging it. I took the basic rough measurements from one they already had & the style is original. I just hope they fit ...
Today I cut out the doll gowns and the top of B's gown. I also cut out the little chef aprons and oven mitts.
12/16 - I finished cutting out the remaining piece of B's gown and H's gown, so I'm ready for assembly at work tomorrow / Tuesday.
Today I cut out the doll gowns and the top of B's gown. I also cut out the little chef aprons and oven mitts.
12/16 - I finished cutting out the remaining piece of B's gown and H's gown, so I'm ready for assembly at work tomorrow / Tuesday.
Nightgowns!
12-17 - I may actually get done in time! Today I got in a little early + lunch + stayed until after 7pm but I got all 4 nightgowns done!
For fabric, we used 2 different prints of Jo-Ann's "Snuggle Flannel" that Emily picked out and lined the doll ones with reclaimed fabric from a really nice white oxford shirt. One of my nicest, actually, and except that it was better than having to throw it away, I hated reclaiming it! I read the reviews prior to buying the flannel (not on their site, but on sewing sites) and knew what I was getting into (it's not known for it's pill-resistance nor longevity), but at the price (under $3/yrd) and considering the kids will outgrow theirs and the dolls will never wash theirs, I think it should be fine. Heck, when I started the kids' I wasn't entirely confident my designer skills weren't just making pretty rags anyway ...
Funny story about the doll-size ones. I usually print out the pattern and the directions as there is no computer in the room I'm sewing in (no room!). Starting with the scrubs, I started to just leave it on the screen at my own desk & just walk back occasionally to verify I was still on track. Well, for these I cut them out at home 2 days before assembly & for some reason thought I'd just remember how they assembled & didn't even bother re-reading it the day of assemble. Yep, I didn't remember exactly right. A little time with the seam ripper & some time just staring at the fabric & I decided an even better (for my use, anyway) way to use these pieces. So, I used the pattern to cut out the top of this but then completely changed it in assembly. I wouldn't say I made a better dress, but I made a better nightgown. Considering the designer wasn't making a nightgown, I don't think she'd mind :)
Regarding the full-size ones, I made them exactly the same as each other & have enough fabric if I horribly guessed the height of the girls (I'll add a ruffle or something). They should be really comfortable, the top is all 2 layers of flannel (which allowed me to have just 1 seam other than the joining of the 2 layers) and allowed that seam to be on the inside (nothing to rub sensitive skin).
Time: I didn't really track the time it took to cut out, especially since I was designing the child-size ones while I went, but I'd guess 60 minutes to cut out + 6 hours to put together (total for all 4). Time to sew snaps in doll-size not included.
Difficulty: I may just be getting better, but pretty easy! The hardest part was lining up the outside & inside of the top when inserting the bottom (and keeping it that way when sewing it).
NOTE: Better pictures on the way!

|
|
|
|
So, what's next?
This.
Well, I did do the above & a few others, but I ran out of time to blog about it. Also, the 'better pictures on the way' turned out to be a lie, sorry! The outfits were, or course, a complete hit & even a couple years later now are still played with regularly.
It should definitely go without saying, but I have no affiliation with American Girl Doll® whatsoever other than buying two!